Drone assembly at Hannover Messe 2026: guided, validated and inspected
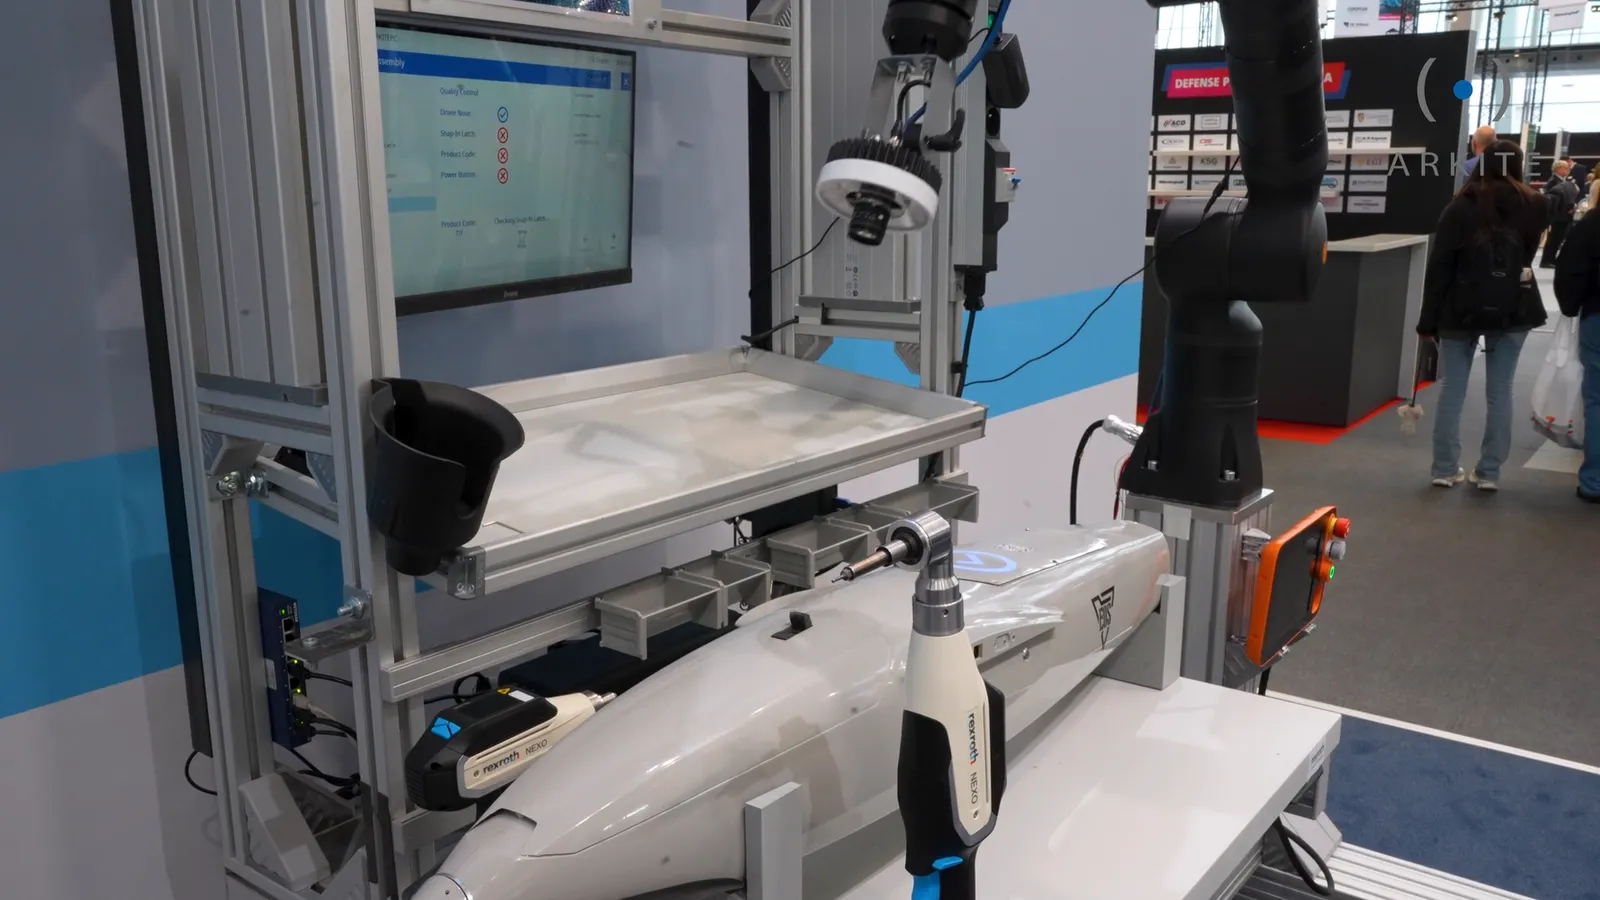
At Hannover Messe 2026, Arkite showed the complete assembly of a UAV surveillance drone at a single workstation. Visitors could follow every step: what the operator sees, what the platform checks, and what happens when a step is not done right. This article walks through the assembly as it was recorded at the fair.
A drone is a good test for manual assembly. It brings together what makes aerospace and defense work demanding: low volumes, several configurations, long sequences, joints that must be tightened correctly and the need to show how each unit was built.
The assembly, step by step
1. Pick the battery from the right bin
The job starts with a projected instruction next to the drone: Pick battery. The bin that holds the battery is lit, so the operator goes straight to the right part instead of searching the rack.
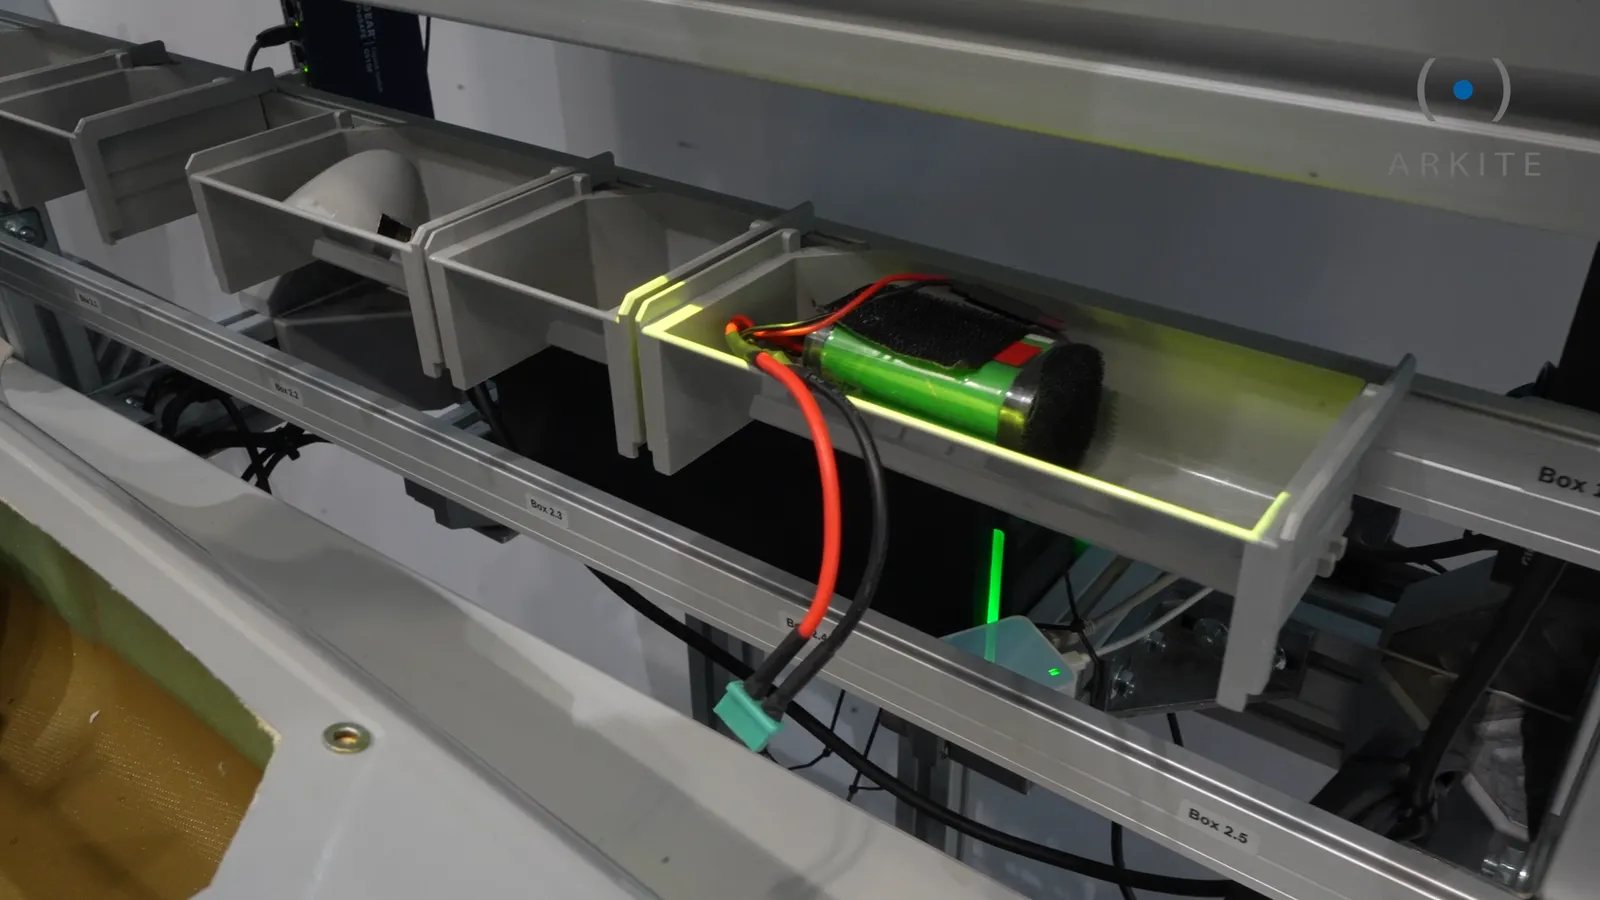
2. Place the battery, with real-time feedback
The next instruction reads Place the battery upright in the housing, and the opening in the drone body is outlined with projection. The 3D sensor checks the result. When the battery goes in the wrong way round, the projected text turns red: Battery placed in wrong orientation. When no battery is detected, the operator sees Battery missing. The step only closes when the battery is in place and correctly oriented, so the error is corrected at the workstation instead of being found later in test.
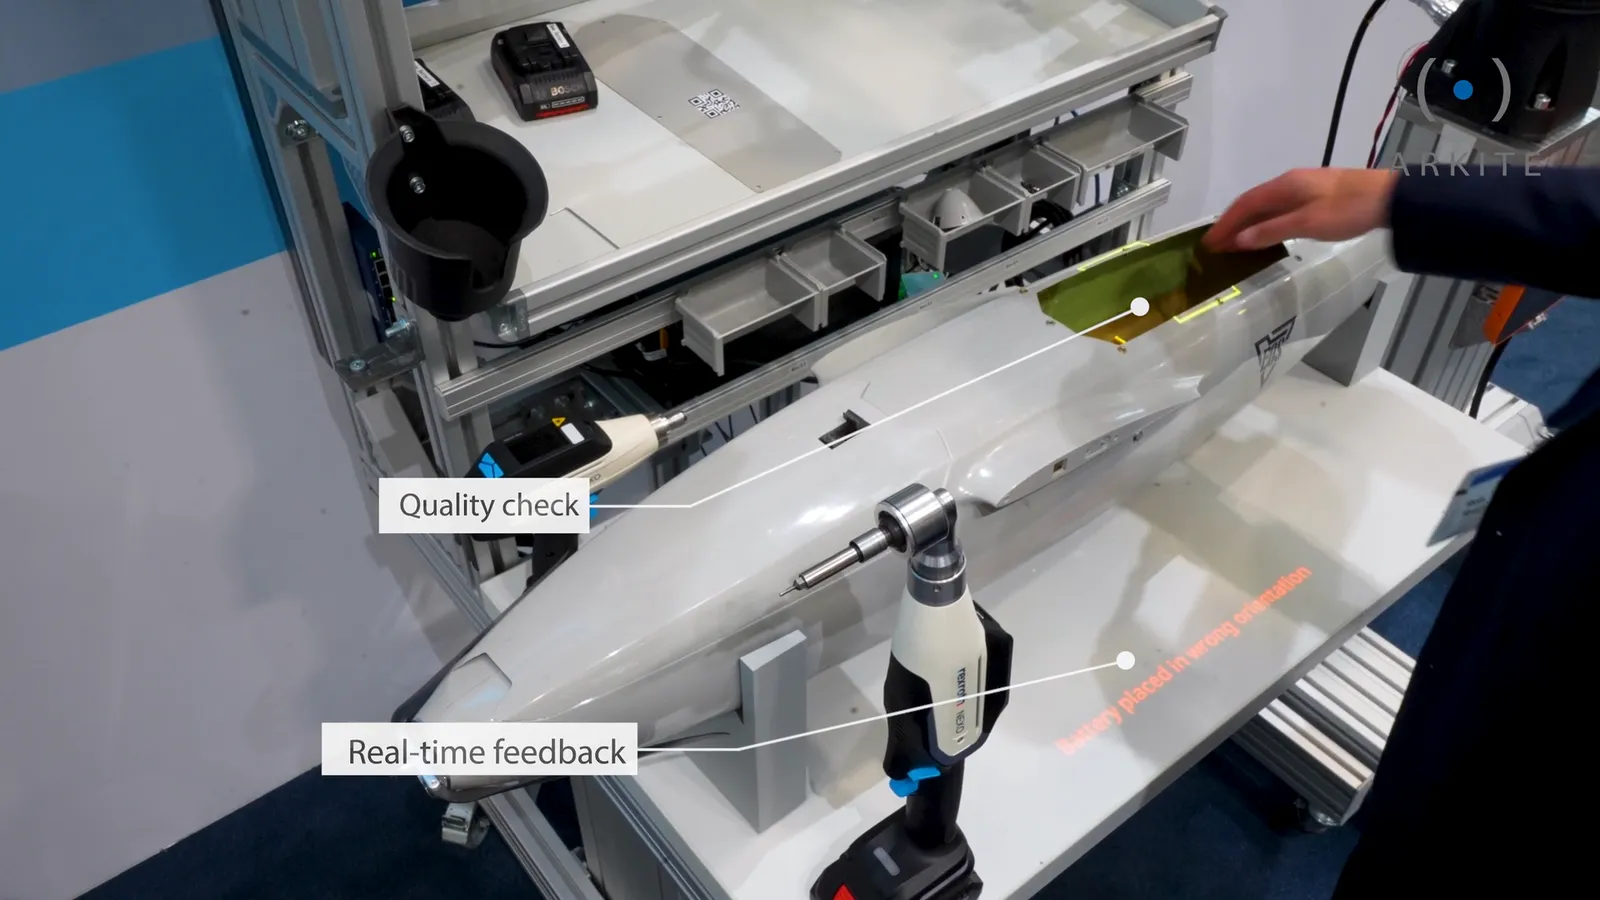
3. Close the cover and tighten it with a wireless smart tool
The cover position is projected on the drone body. For the screws, the operator takes a Bosch Rexroth Nexo, a wireless tightening tool connected to Arkite. The tool is enabled for this step, and Arkite validates each tightening together with the position of the tool, so it confirms both that the screw was tightened and that the right screw was tightened. The result is recorded with the unit.
4. Scan the unit
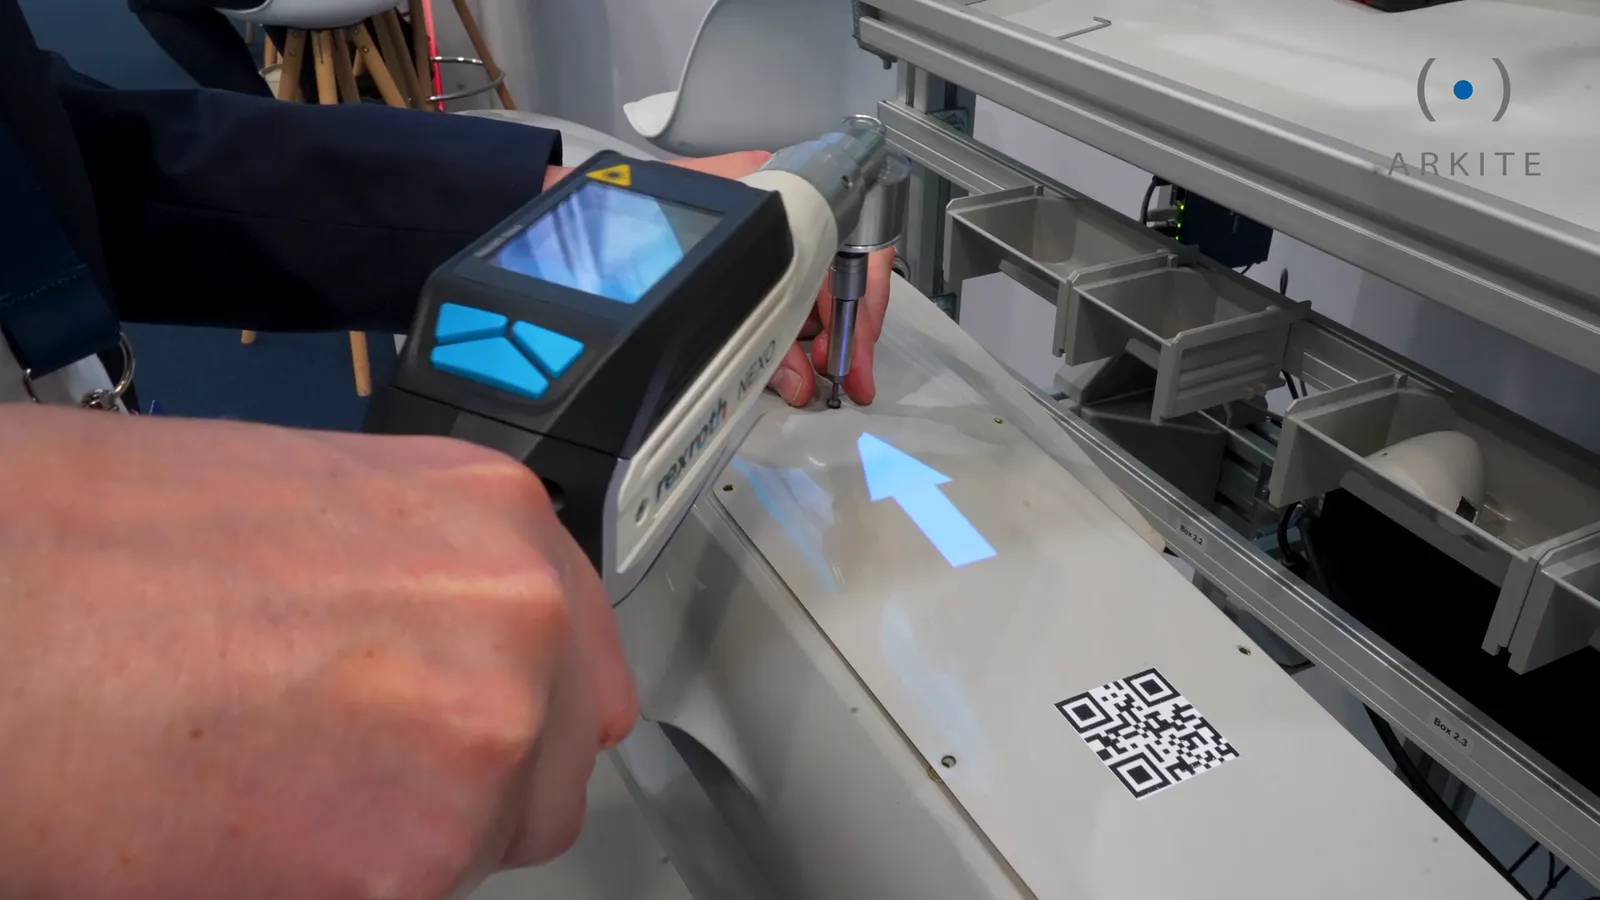
A projected arrow shows where to scan, and a handheld scanner reads the QR code on the drone. The scan identifies the unit, so the steps, checks and tightening results of this assembly are stored against that specific drone.
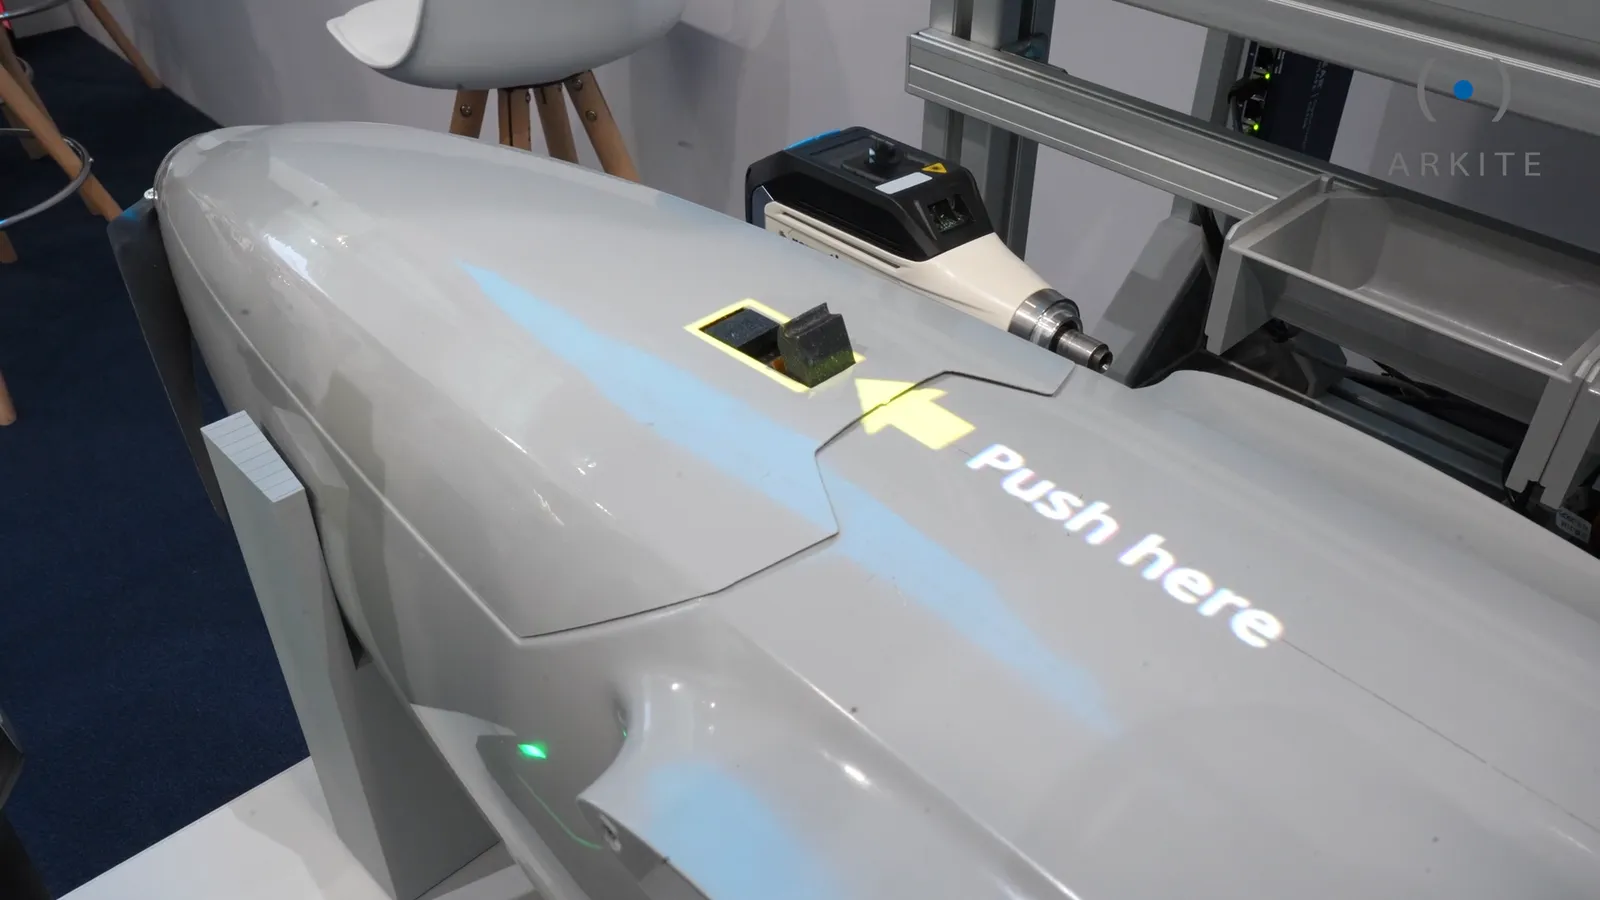
5. Guided handling: push here
Some steps are about how to handle a part rather than which part to take. Here, Arkite projects Push here with an arrow at the exact spot where the operator has to press to seat a component.
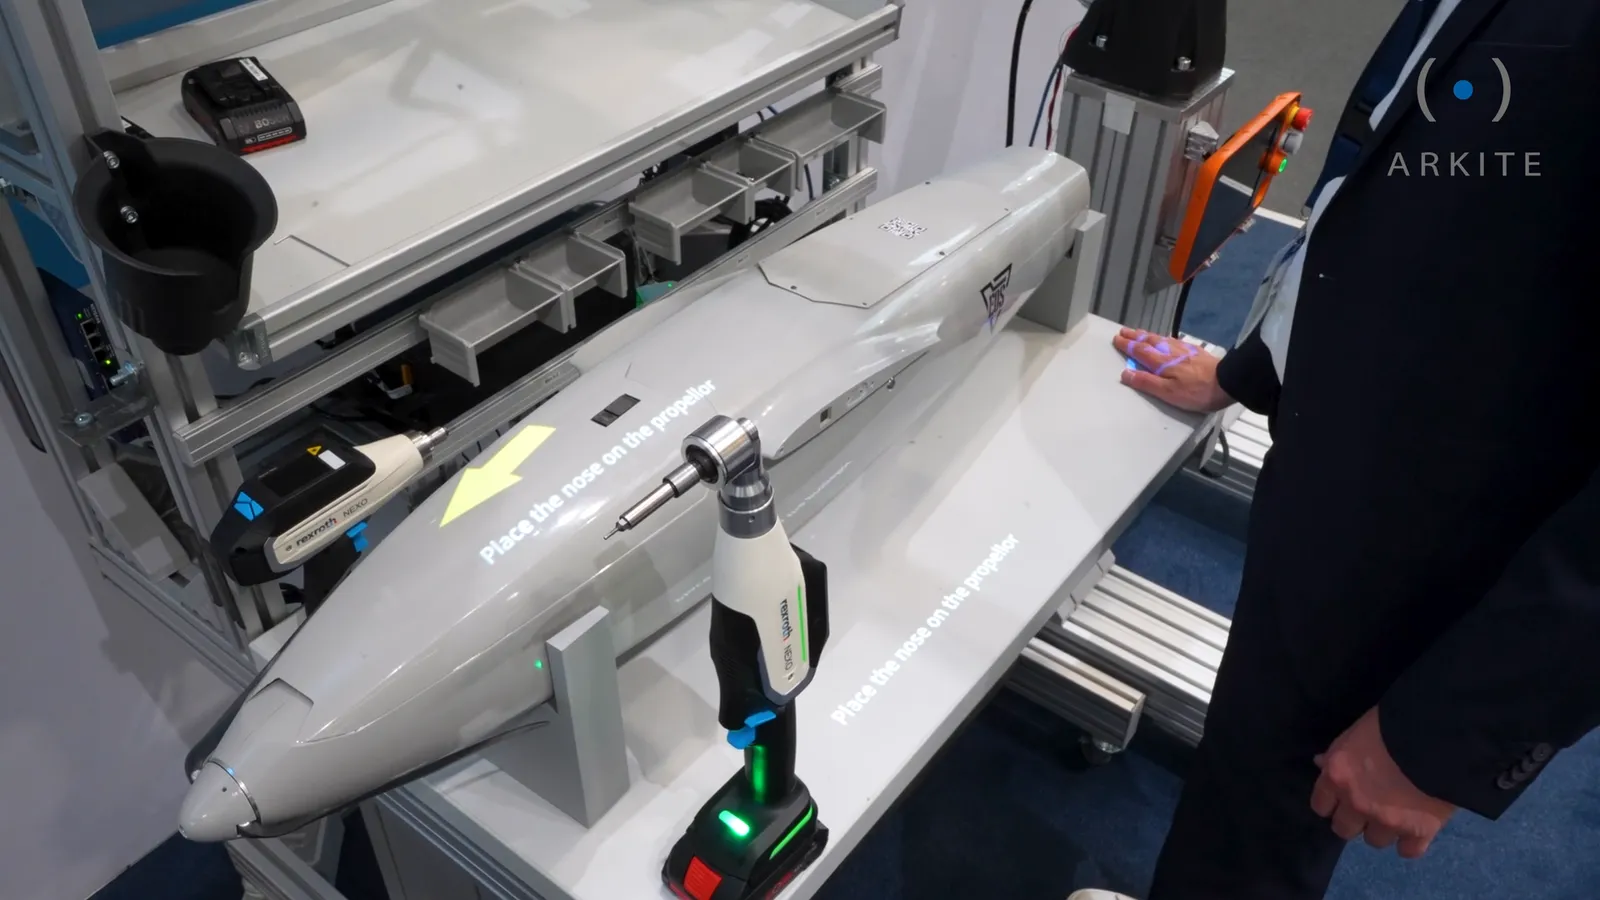
6. Fit the nose
The operator is guided to Pick drone nose, then to Place the nose on the propeller, with an arrow projected on the drone to show the direction of assembly.
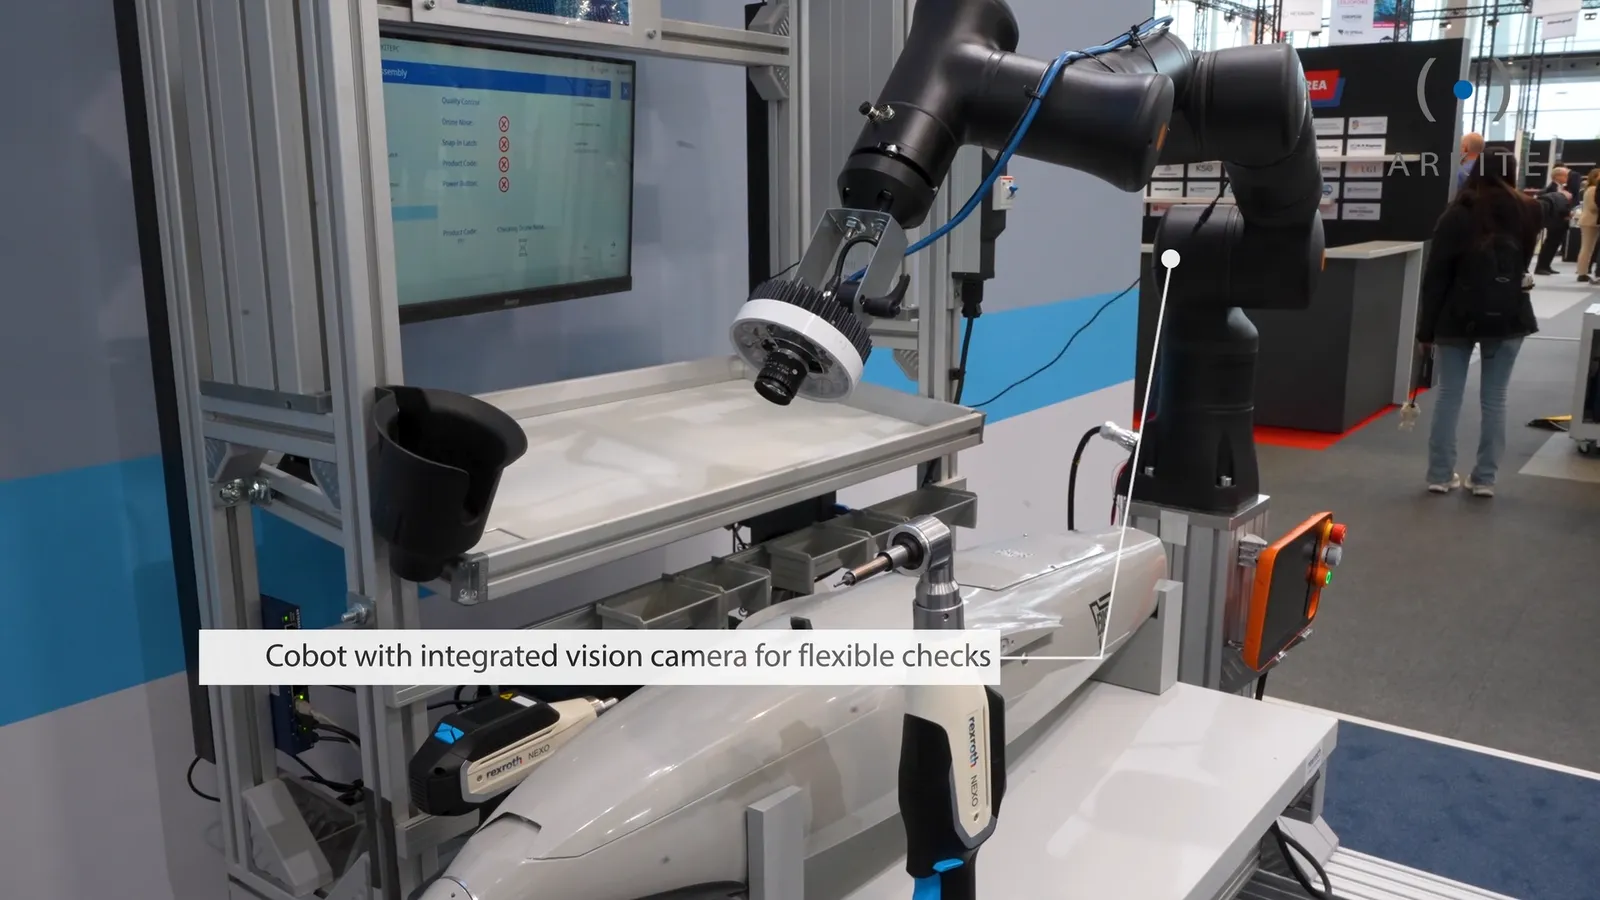
7. Final check by a cobot with a vision camera
When the last assembly step is done, the projection reads UAV Surveillance Drone fully assembled. Now starting quality control. A collaborative robot with an integrated vision camera then moves to the points that need to be checked. Because the robot carries the camera, it can be positioned for each check instead of relying on one fixed view. The result is projected directly on the drone: a red cross marks a failed check, a blue check mark a passed one. OCR and barcode reading confirm the codes and markings on the product.
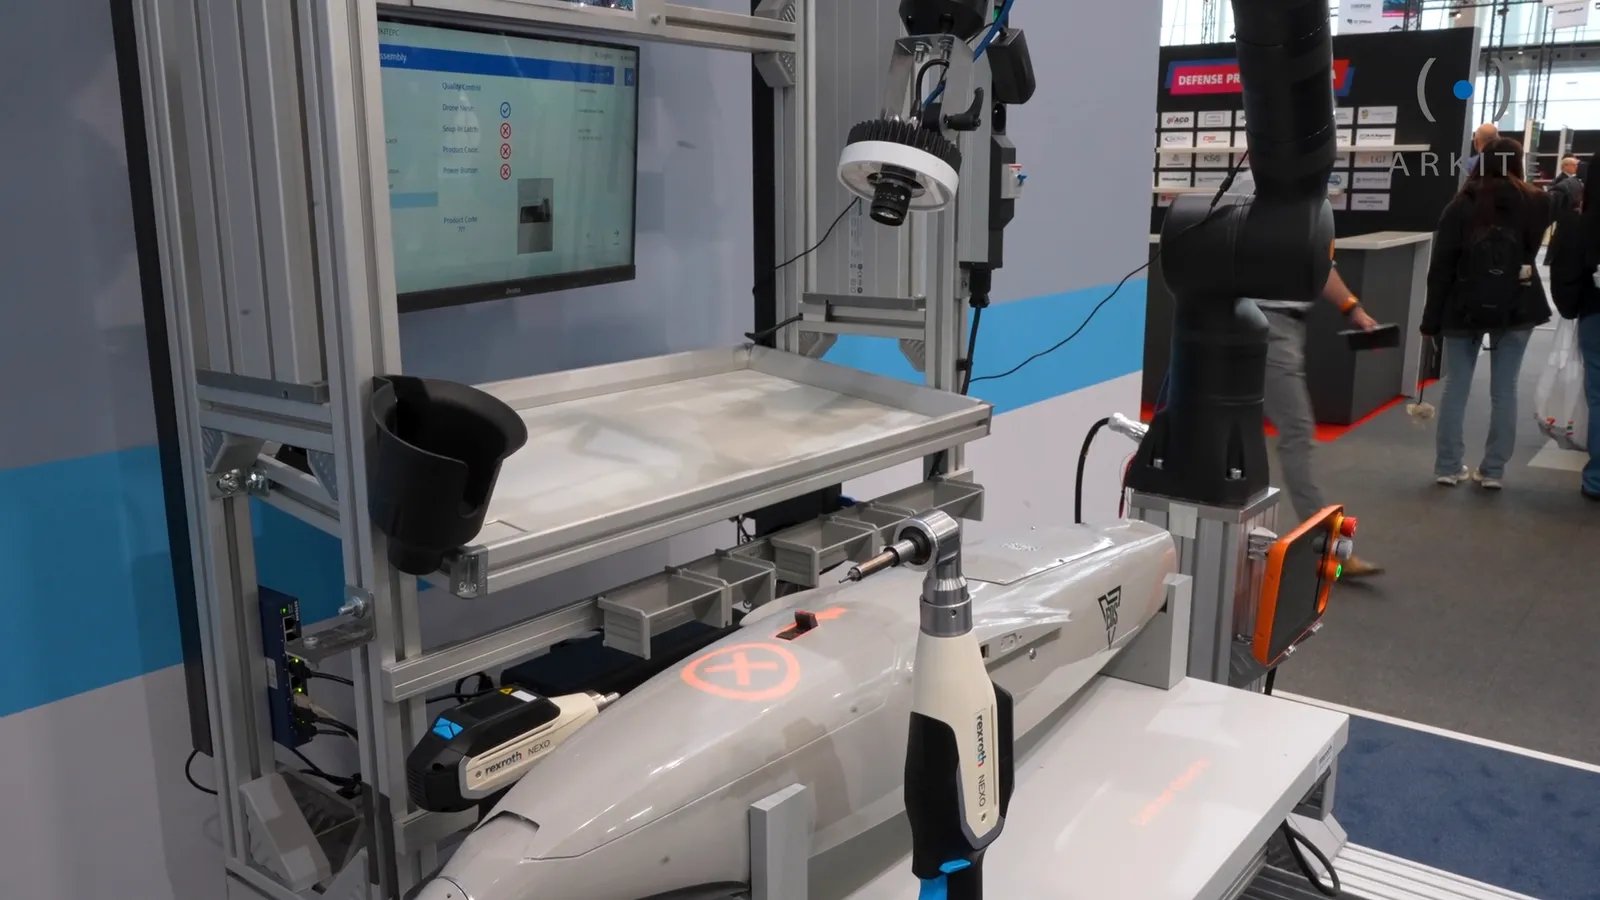
What the demonstration shows
- Guidance, validation and inspection in one job. Projected instructions (Arkite GUIDE), 3D validation of picks and placements (Arkite VALIDATE) and in-process inspection with a vision camera (Arkite VISION) run on the same software core, at the same workstation.
- Errors are stopped at the step where they happen. A wrongly oriented battery or a missing part is flagged immediately, not at the end of the line.
- Devices work as part of the job. The smart tool, the scanner and the cobot with its camera are triggered by the step the operator is on, and their results come back into the same record.
- Every unit has its own record. Picks, errors, tightening results and inspection results are stored per scanned unit.
Why this matters for aerospace and defense
In aerospace and defense, manual assembly often runs on long procedures, many revisions and small batches, and every unit has to be built to the released configuration. A workstation that guides each step, checks it before the next one starts and records the result per unit gives engineers, quality teams and auditors the same view of how a product was built. More on how Arkite supports these manufacturers is on the aerospace and defense page.
The drone video and all other Arkite recordings are in the video library. To see the platform on an assembly that resembles yours, book a demo.